DVD Ripper Platinum User Guide
It's easy for even novices to decrypt DVD, rip DVD and convert DVD to video/audio with DVD Ripper Platinum within 3 steps: 1. Load DVD files; 2. Set output profile; 3. Start DVD to video/audio conversion.
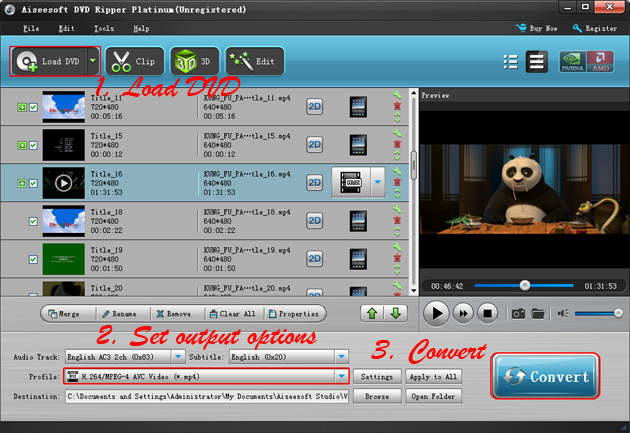
To learn the details of using DVD Ripper Platinum to rip to DVD to video and audio, follow the step-by-step tutorial below:
Load DVD
This DVD ripper can not only rip DVD discs (DVD-5, DVD-9), but also deal with DVD Folders, ISO files and IFO files:
To load DVD files, you can choose any of the following 3 methods:
1. Click "File" on the menu bar to load DVD files;
2. Click "Load DVD" icon on the toolbar to load DVD files;
3. Drag and drop DVD files directly from desktop or Windows Explorer.
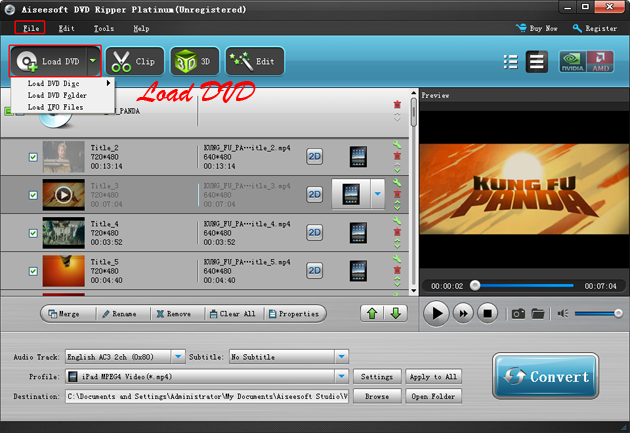
Tips: To convert VOB videos, you need to load corresponding IFO files from DVD-ROM or DVD folders since this DVD ripper cannot convert VOB files videos directly. To convert single VOB files, please use Video Converter Ultimate.
Edit DVD videos (Optional)
In addition to DVD ripping, this DVD ripper also supports to make some easy editings to DVD videos before the DVD to video conversion. It enables users to pick the most proper subtitle and audio track, merge several titles or chapters into one video, trim the favorite episode, capture the wonderful scenes, crop unwanted black edges, apply special video effects, adjust video brightness, contrast & saturation and add image or text watermark.
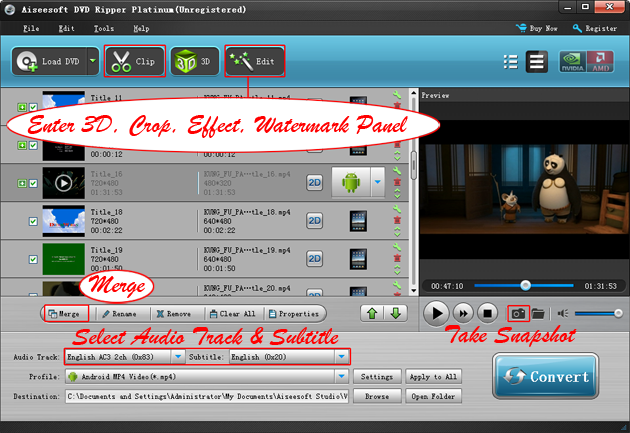
Merge: To merge multiple titles and chapters, please first select the check boxes of the titles or chapters that you want to join together, and then select the check box "Merge into One File".
Please note that, the chapters are hidden by default, and if you want to display them, please select "Show Chapters" in the "Edit" menu.
Capture: To take snapshots of the wonderful scenes, please click the camera icon when previewing the DVD movie with the built-in DVD player.
Pick subtitle & sound track: Usually, a DVD movie may have different languages or dialects, so there comes multiple subtitles and audio tracks. In this DVD ripper, you can choose the appropriate ones for the output video with the drop-down menus.
By clicking the "Trim" icon in the toolbar, you'll enter the "Trim" interface.
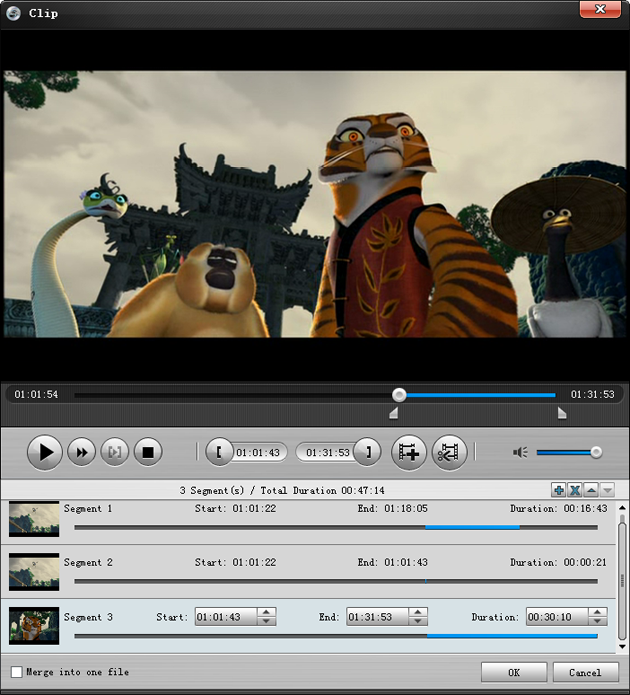
Trim: To cut off undesired episodes and leave the cool one, simply input accurate timings or drag the trimming sliders to set the start time and end time that you prefer.
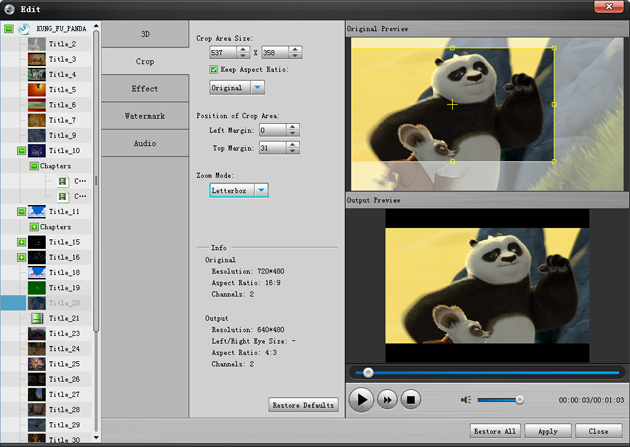
To enter the "Video Edit" interface, just click the "Edit" icon in the toolbar of the main interface.
Crop: Drag the adjustment handles or adjust the values of "Left", "Top", "Cropped Area Size" spinners to specify the right position and size of the cropped area. Also, use the "Zoom" drop-down list to select the Aspect Ratio of the cropped area, or plainly check the "Keep Aspect Ratio" box. Furthermore, this DVD ripper provides shortcuts to make cropping operation much easier: "Ctrl+Arrow" Keys to adjust the crop area location and "Shift+Arrow" Keys to zoom the crop area.
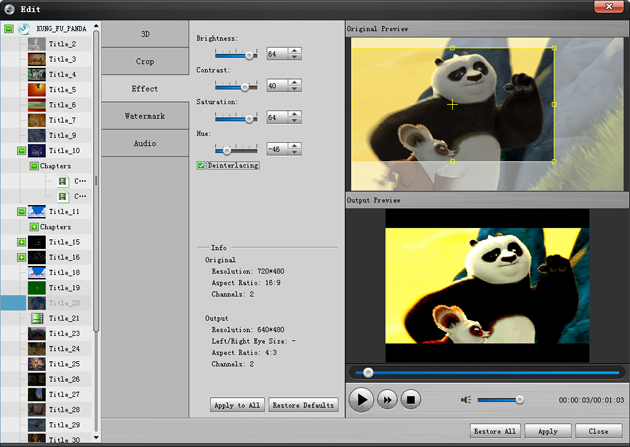
Apply video effects: Under the "Effects" Tab, users can freely adjust output video "Brightness", "Contrast" and "Saturation" with the corresponding ; apply special video effects ("Gray", "Emboss", "Negative" and "Old Film" included) with the drop-down menu; and choose the "Deinterlacing" mode to convert interlaced video such as common analog television signals to non-interlaced form: "None", "Repeat odd field", "Repeat even field", "Odd interpolate" and "Even interpolate".
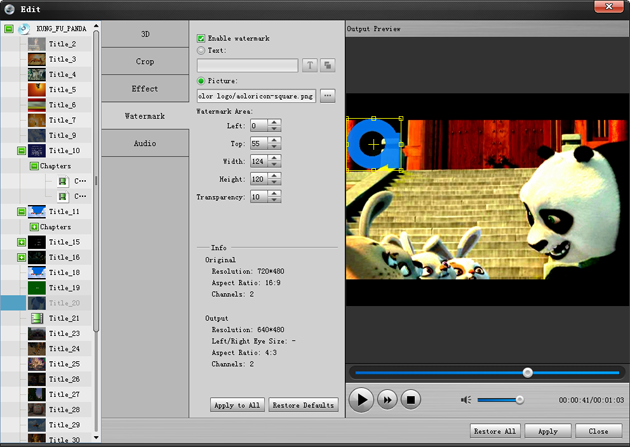
Add watermark: To credit your works to avoid unauthorized uses, adding a watermark will make great help. In the program, users are able to add either text or image watermark.
Set output options
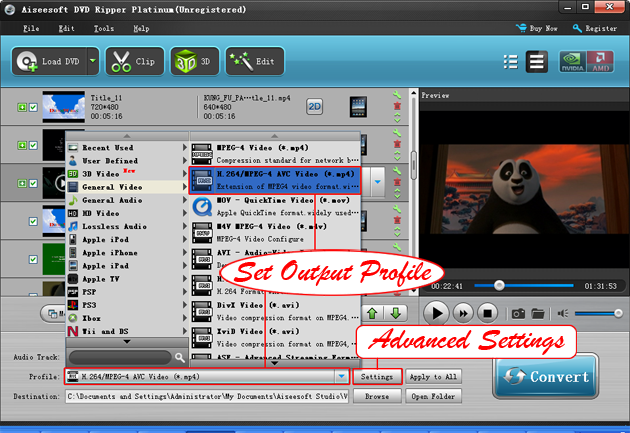
This DVD ripping software has many predefined output video and audio profiles built in. Users can choose any of the "Common Video", "Common Audio", "HD Video", "Online Video" profiles or optimized profiles for mobile phones, tablets, video game consoles and MP3 players as output option.
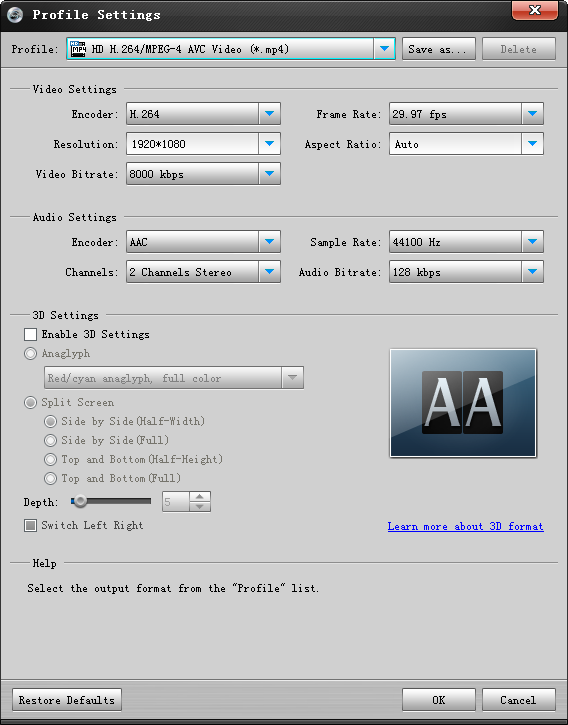
To customize the output parameters (like video resolution, Encoder, Frame Rate, Bit Rate and audio Sample Rate, encoder, Channel, Bit Rate) for specific needs, click the "Settings" button on the main interface to enter the "Settings" panel.
For custom output profile, you can click the "Save as" button and input the profile name to save it for future use. Next time, you'll find the custom output profile in the "My Favorites" list.
If your device cannot hold large files, you can use the "Split" function to split large DVD videos into small segments by time or by file size.
Start DVD to video conversion

When all are ready, just click the "Start" button to begin the DVD to video conversion.
Soon, you'll find the converted videos in the output directory.

